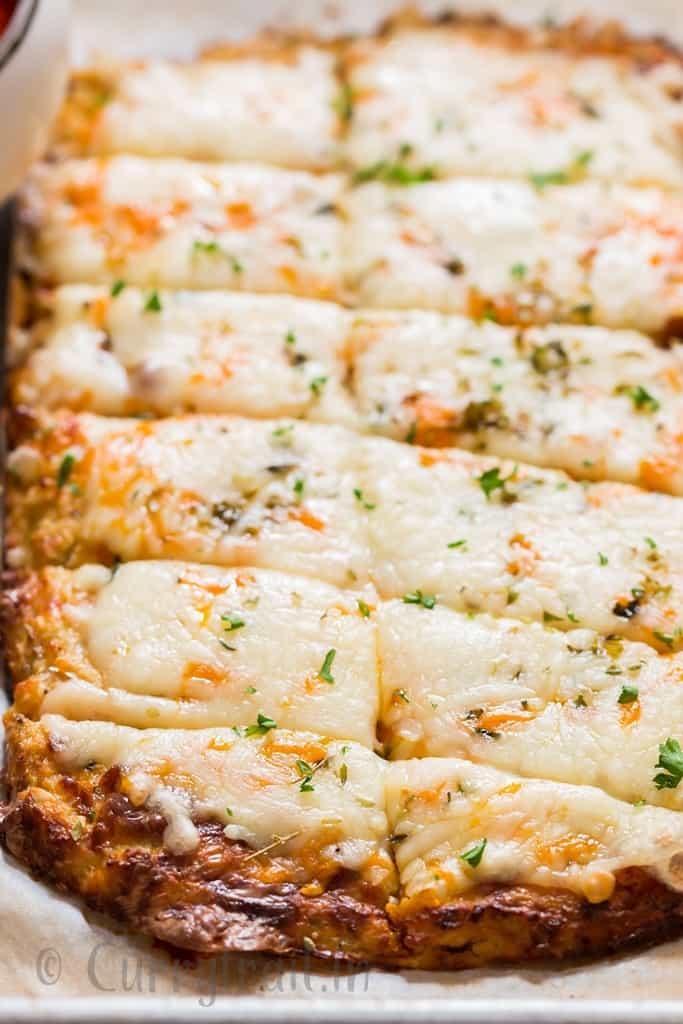
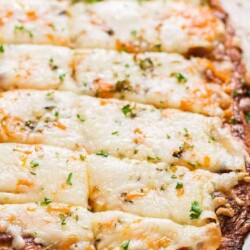
Transform cauliflower into sensational cheesy cauliflower breadsticks made of cauliflower crust. It’s a low-carb, gluten-free, and healthier alternative to regular breadsticks. Best served with spicy marinara sauce.
The recipe was originally posted in February 2015. Updated in March 2019 with photos and added a video recipe.
Why does this recipe work?
- Low-carb, gluten-free snack.
- Packed with nutrients and is better for you than regular breadsticks.
- packed with amazing flavors.
Ingredients
- Cauliflower – a large head of cauliflower, but I’d advise you double the recipe (make it 2 or 3 heads of cauliflower) because this will vanish in no time.
- Cheese – I prefer to use a mix of mozzarella and cheddar cheese. Cheese helps hold the shape and flavor of the breadsticks.
- Eggs – help bind everything together.
- Garlic – Fresh minced garlic or garlic powder can be used. I always vouch for fresh ingredients. One of the most important flavors in cauliflower breadsticks is garlic.
- Pepper and Salt – season to taste.
- Oregano – dried oregano adds flavors. Feel free to include more herbs for flavor such as basil, dill, or Italian seasoning.
Ste-by-step instructions
- Step 1: Remove the green leafy part and roughly chop it into florets.
- Step 2: Place the florets in a food processor and pulse until cauliflower florets are chopped to rice consistency. Note: you can also use a grater to make cauliflower rice.
- Step 3: Transfer the riced cauliflower to a microwave-safe bowl.
- Step 4: It’s important to cook cauliflower which helps remove excess moisture and helps it hold its shape. Cook cauliflower rice for 10 minutes. Let it cool. Note: You can cook cauliflower rice on a stove top on a skillet at low heat for a few minutes, ensuring you do not brown cauliflower rice.
- Step 5: There is a possibility of some of the moisture in the riced cauliflower. Allow to cool cooked cauliflower rice until there is no steam coming out. Transfer cauliflower to a bowl lined with a kitchen towel.
- Step 6: Squeeze and twist all the liquids.
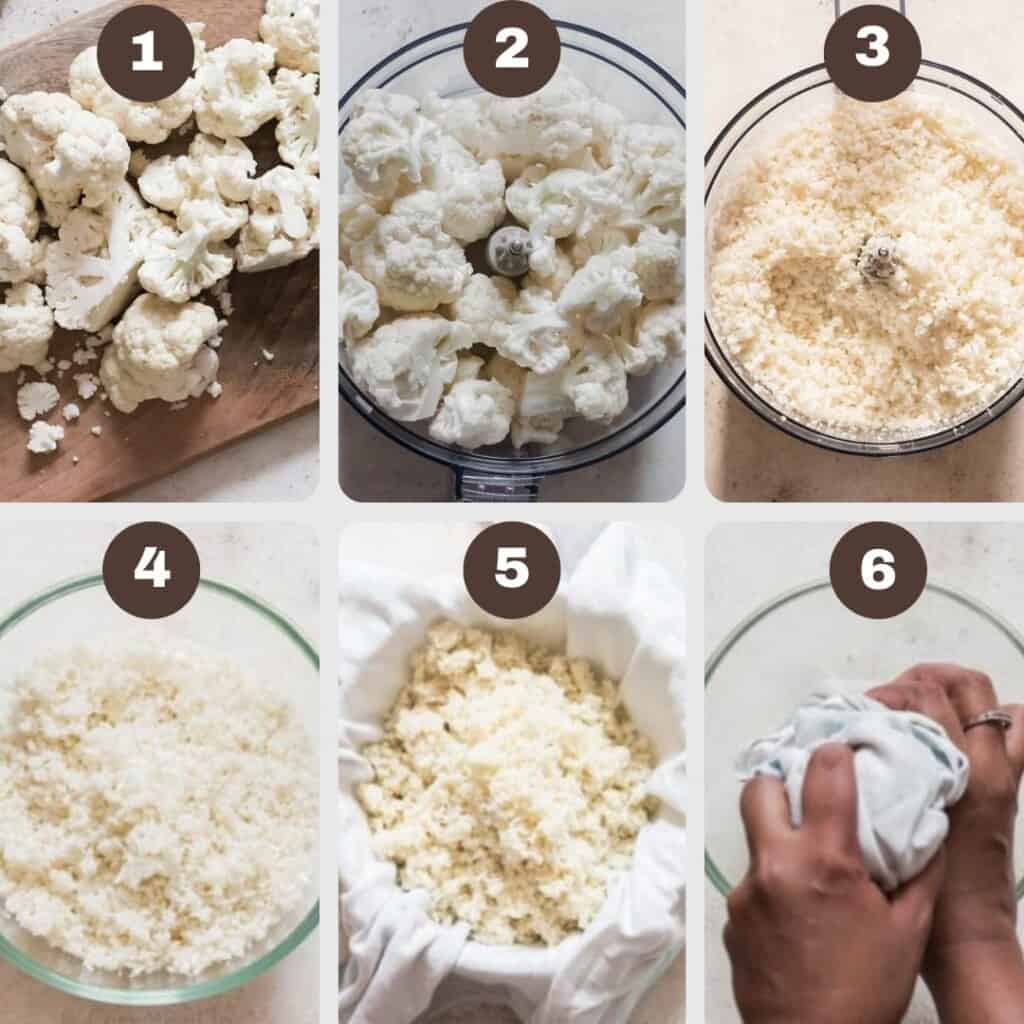
- Step 7: Squeeze as much liquid as possible.
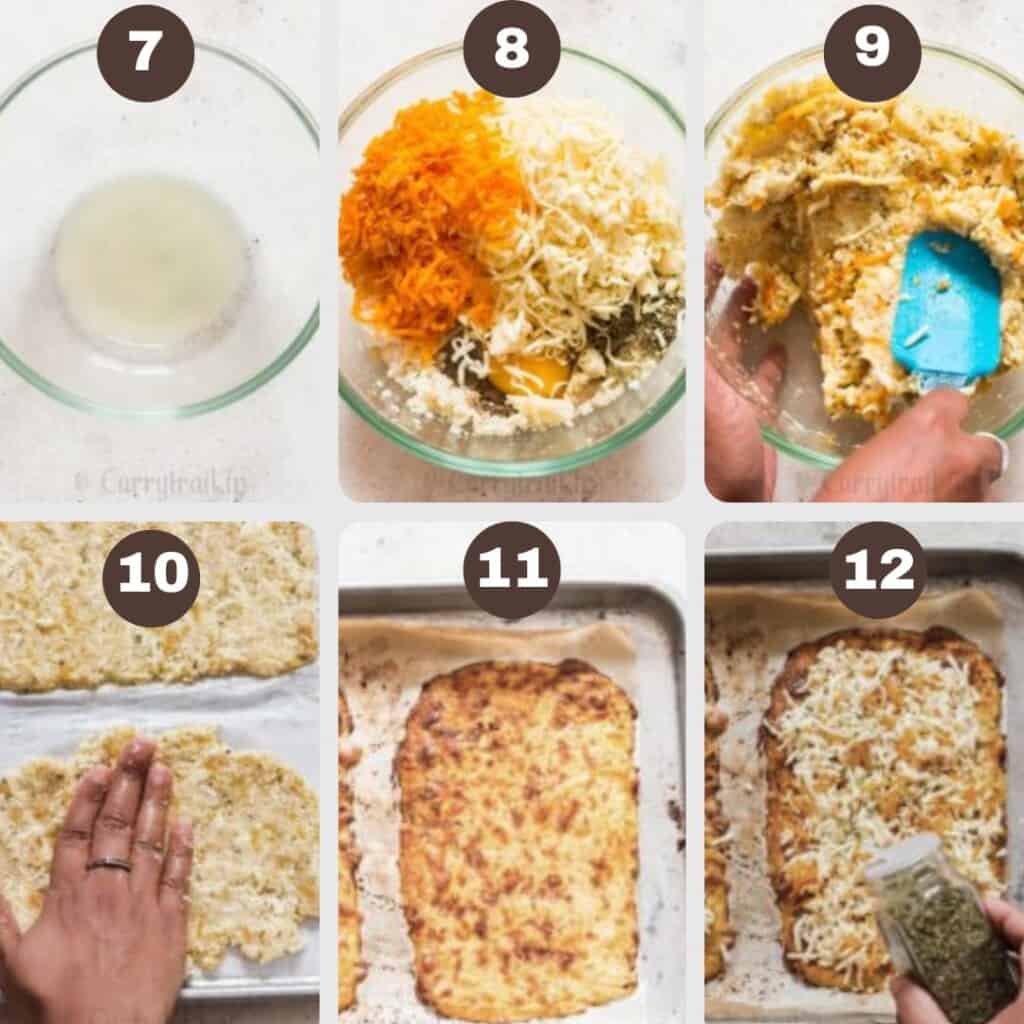
- Step 8: To dry the cauliflower mix, add minced garlic, salt, pepper, oregano, eggs, and cheese (2 cups mozzarella and ½ cup cheddar).
- Step 9: Mix until combined.
- Step 10: Line a baking tray with parchment paper, and spray with cooking oil. Divide the mixture into equal portions. Shape the breadstick mix into a rectangle of approximately 9” x 7”. Press down the dough to form an even-level rectangular shape, and use a rubber spatula to straighten the edges. Bake in a preheated oven at 450 F for about 18 to 25 minutes or until you begin to see a golden brown top on cauliflower breadsticks.
- Step 11: Sprinkle mozzarella and cheddar(if you prefer). Sprinkle some oregano as well. Place it back in the oven and bake for another 5 minutes, until the cheese melts.
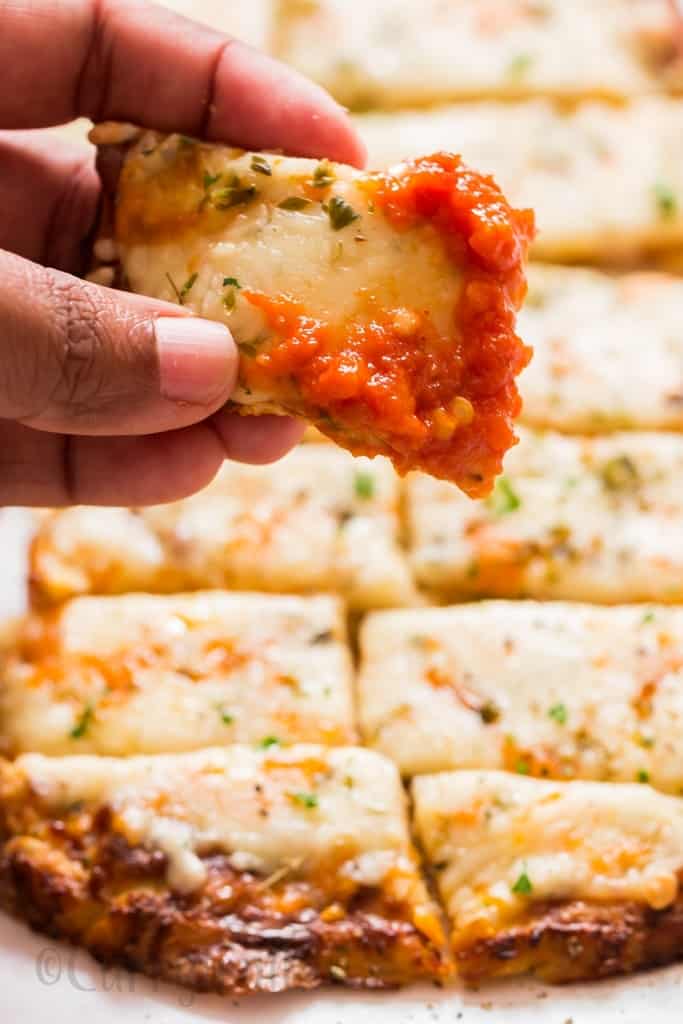
- Step 12: Note – You can broil once the cheese melts for 5 minutes to get a golden brown top. Slice it up into rectangle sticks and serve immediately with marinara sauce for the best experience.
Other related recipes
- Roasted Cauliflower Popcorn
- Roasted Cauliflower Steaks
- Cauliflower Cheese Sauce
- How To Make Low Carb Cauliflower Rice
- Low Carb Cauliflower Fried Rice
Don’t forget to Subscribe to CurryTrail Recipes below to get our newest recipes delivered straight to your inbox.
If you love this recipe, keep in touch, and don’t miss out on any of Currytrail recipes. Follow me on Pinterest, Facebook, and Instagram.
Cheesy Cauliflower Breadsticks
Ingredients
- 1 head Cauliflower a large head about 3 lbs
- 4 Eggs
- 6 cloves garlic minced
- 1 teaspoon Salt or to taste
- 1 tablespoon pepper adjust to taste
- 2 tablespoon oregano or mixed Italian seasoning
- 2 cups Mozzarella cheese grated
- 1 cup cheddar cheese grated – optional
For Topping –
- 1 cup Mozzarella cheese grated
- 3 tablespoon cheddar cheese – optional
- 1 teaspoon oregano
To Serve –
Instructions
Cauliflower Rice –
- Preheat oven to 450 degrees F. Rinse cauliflower, remove outer leaves and separate into florets with a paring knife. Place cauliflower florets in a food processor and process until “rice” texture. Some coarse chunks are fine.
Cook Cauliflower Rice –
- First in microwave safe bowl, cook cauliflower rice for 10 minutes. Let it cool.
- If you don’t have microwave, cook cauliflower rice on stove top on very low heat for few minutes, ensuring you do not brown cauliflower rice.
Wring Out Liquids –
- I highly recommend you to wring out all the liquids out by placing cooled riced cauliflower in kitchen towel, squeeze and twist all the liquids out.
Cauliflower Breadstick Dough –
- To dry cauliflower mix, add minced garlic, salt, pepper, oregano, eggs and cheese (2 cups mozzarella and ½ cup cheddar). Mix until everything comes together.
Prepping Baking Tray –
- Line up baking tray with parchment paper(not butter paper). And to be sure that cauliflower breadsticks don’t stick, spray parchment paper with cooking oil.
Shape and Bake –
- Separate the mixture into equal portion depending on how big or how small breadsticks(or cauliflower pizza base) you prefer to make. Form a rectangle of approximately 9” x 7” using hands. Press down the dough to form even level rectangular shape and using a rubber spatula straight the edges.
- Bake in pre-heated oven at 450 F for about 18 to 25 minutes or until you begin to see golden brown top on cauliflower breadsticks.
- Remove from oven once it begins to brown. Then sprinkle some more mozzarella and cheddar(if you prefer). Sprinkle some oregano as well. Place it back in oven and bake for another 5 minutes, until cheese melts.
- Note – You can broil once cheese melts for 5 minutes to get golden brown top.
- Slice it up into rectangle sticks and serve immediately with marinara sauce for best experience.
- You can also freeze the breadsticks tightly wrapped in plastic, for up to 1 month. Thaw on a counter or in a microwave.
Video
Notes
- If you don’t have microwave, cook cauliflower rice on stove top on very low heat for few minutes, ensuring you do not brown cauliflower rice.
- I highly recommend you wring out all the liquids out by placing microwave and cooled riced cauliflower in kitchen towel, squeeze and twist all the liquids out. Any liquid left will make shaping of breadsticks extremely hard.
- You can also freeze the breadsticks tightly wrapped in plastic, for up to 1 month. Thaw on a counter or in a microwave.
Nutrition
Created by Jyothi Rajesh
Thank you for stopping by.
I’m Jyothi Rajesh (Jo for short) and i’m the founder of the food blog, Curry Trail where I share my culinary Adventures. I live in Bangalore, India. I’m a mom of two beautiful kids. My passion is creating and sharing delicious and easy recipes for the home cook. I have been blogging since 2007 and many of my recipes have appeared in both online and print publications over the years. Learn more about Jyothi Rajesh.




Comments & Reviews
Sheila Carrick-Langford says
I made this for dinner tonight. Both my husband and myself loved the breadsticks! They took a bit of work but we’re delicious! I just need to start them sooner. LoL
Jyothi Rajesh says
Thank you so much, so glad you and your husband liked the recipe! Thank you
Karly says
This sounds delicious!
jyothirajesh says
Thank you Karly
Emmeline says
Love this variation on my old favorite breadsticks! And as I am obsessed with anything cauliflower right now you know I’m making this the coming weekend!!
jyothirajesh says
Thank you Emmeline
Sonal says
What a great idea to eat guilt free on these Cauliflower Breadsticks. Loved the detailed recipe. A must try for sure.
jyothirajesh says
Thank you Sonal
Bee says
This is a perfect appetizer to try with Cauliflower. . . ? Looks delicious. Will definitely try this for weekend.
jyothirajesh says
Yay, so glad you like it. Thank you Bee. Hope you enjoy
Mahy Elamin says
These cheesy cauliflower breadsticks recipe looks unreal! Definitely, I will make it on the weekend for my family.
jyothirajesh says
Thank you Mahy
Danielle Wolter says
I am totally intrigued by these. what a fun and unique idea. And i haven’t had lunch – these things have me hungry!
jyothirajesh says
Thank you Danielle.
Judy says
This is happening tonight! Sounds delicious! Thank you.
jyothirajesh says
yay, so excited you try it. Do let us know how it turns out.
Linda @ Veganosity says
You’ve outdone yourself with this recipe Jyothi! These look so crispy and delicious. I’m going to have to try and make these vegan.
jyothirajesh says
Thanks Linda! 🙂
Dolphia Nandi says
What an innovative way
jyothirajesh says
Thanks Dolphia 🙂