Cooking rice in Instant pot every single time needs a guide that tells you the rice to liquid ratio, how long to cook it, and all other tips. This basic guide to cook perfect rice in instant pot is not just for beginners. You’ll love how quick and easy it is to make rice in instant pot!

Remember the Amazon prime day madness last month? Just like black Friday, it was very easy to get over whelmed and give in ultimately ending up with loads of stuffs in your house. I know many people who bought stuffs that they actually don’t want (post prime day discussion revealed a lot).
Confession – I too got carried away with the deals and even sat down and loaded my cart with loads of stuffs, but I never hit that payment button LOL. At least I got the virtual shopping therapy satisfaction. It was just about that!

But things changed when I saw the Instant Pot deal on prime day. I’ve wanted to buy one since the Instant pot fever caught up on the net some time back. The actual cost of the pot was not a big deal but that crazy shipping and customs price was sky rocketing; it is like you will end up paying 3 times more money for shipping than the actual price of the Instant pot itself! It was crazy. So was the never ending craze for Instant pot recipes on the internet.
I waited and waited hoping anyone traveling from US would carry it for me saving me ridiculous amount of shipping+custom money. I waited, and waited. Approached few distant friends whom I don’t chat with on regular basis, tried every possible ways.
Finally on Prime day, amazon was giving away the instant pot at few couple of dollars less, I did not get over excited, because I knew the shipping charges are not gonna change. So selected the Instant Pot I wanted to buy, added it to the cart, checked the total cost with shipping (yes I held my heart). And this time I decided I will buy it and I was ready to pay the ridiculous amount of money.
So my one and only Prime day shopping was – Instant Pot* .
.
Now I’m ready to bask in the glory of instant pot recipes LOL!

If you haven’t heard of Instant Pot*![]() , let me introduce you – Instant Pot is a smart multi-use Electric Pressure Cooker designed with the objective of being Convenient, Dependable and Safe. It’s an multi cooker that can do the job of a pressure cooker, slow cooker, rice cooker, steamer, and more. It’s got all these little buttons on it set for different types of cooking. You can pressure cook, steam, make yogurt in it, saute/brown veggies, and can be used a warming pot! The best part? Just like Rice Cookers, you can set it and forget it.. It’s a single appliance that does the job of seven different kitchen appliances or tools.
, let me introduce you – Instant Pot is a smart multi-use Electric Pressure Cooker designed with the objective of being Convenient, Dependable and Safe. It’s an multi cooker that can do the job of a pressure cooker, slow cooker, rice cooker, steamer, and more. It’s got all these little buttons on it set for different types of cooking. You can pressure cook, steam, make yogurt in it, saute/brown veggies, and can be used a warming pot! The best part? Just like Rice Cookers, you can set it and forget it.. It’s a single appliance that does the job of seven different kitchen appliances or tools.
So I got a brand new insta pot, what next?
Try a few basic recipes, obvious!
Rice – is everyday staple at home. The obvious experiment with an Instant pot was to learn and experiment on cooking rice. Cooking rice in an instant pot to cooking rice in regular Indian pressure cooker is not much different. What varies is the rice to liquid ratio (a little different here) and the time. You need to get used to the settings on the Instant pot first. Try a few basic dishes. And before doing all that read your manual thorough – yes that boring part of working with any new gadget!
Cooking rice in an Instant pot may be straight forward and look easy, but perfecting rice in Instant pot needs a few tips and tricks that you need to remember.
You can make a bit chewy textured rice or completely softer texture rice how ever you want. Just tweak the liquid amount and time to cook the rice to achieve the result you prefer.
We served rice cooked in Instant Pot with Instant Pot Butter Chicken along with naan (flatbread) SO SO GOOD! Let me assure you this will be perfect dinner or lunch if you plan ahead.
Helpful Kitchen Tools:
How to cook rice in instant pot?
To make white rice –

Rinse –
You can use white rice or basmati rice. Basmati rice is long grain aromatic rice.
First step is to rinse the rice. The debate here is to rinse or not to rinse rice. I ALWAYS rinse rice. Rinsing by gently scrubbing rice with your fingertips not just removes dirt but also the excess starch. The cloudy water you see when you rinse rice is starch and we want to remove the excess starch which will prevent the rice from becoming gluggy.
Rice to liquid ratio –
1 cup rice
1 cup liquid (you can use vegetable broth, chicken broth, or just water), remember 1 cup liquid is measured as 250 ml
1 tablespoon vegetable oil
¼ teaspoon sea salt
For long grain basmati rice –
1 cup basmati rice
1.25 cup liquid
1 tablespoon vegetable oil
¼ teaspoon sea salt
Adding little oil while cooking rice prevents it from sticking to the pan and also makes rice grains nice fluffy separate grains of rice. This step can be avoided but I recommend you to try once with oil to see the difference. You’ll love how each grain of rice is separated.
Pro Tip – for adding a little flavor to the otherwise boring bland rice is to season it with salt.
A little sea salt while cooking rice enhances the taste.
Liquids can be water, a combination of water and stock or just stock. Stock enhances the flavor of the rice. You wont be stuck with bland boring rice anymore if you use stock to cook rice in Instant pot.
I went one step ahead and roasted uncooked wet rice (rinsed rice) in oil for 2 minutes on saute mode on Instant Pot. This has 2 benefits, brings out the nutty flavor of rice and ensure fluffy rice every single time. This little trick is followed by every Indian mother while cooking rice pilaf (puloa) or biryani rice in cooker. When rice is roasted in oil before adding liquids, you get fluffy, separate grains of rice. This step is completely optional. Totally up to you.
1.Turn on Instant pot. Click on saute mode. Add oil and to it add rinsed wet rice. Saute for 2 minutes with constant stirring.
2.Adding Liquids –
Add 250 ml of water+vegetable or chicken broth or just water over the rice.
Pro Tip – soon as you pour the liquids, close the lid immediately without waiting. You don’t want to loose the liquids. Also if you like a bit sticky consistency rice allow rice to rest for longing time.
You can skip roasting rice and add rice and liquids along with salt and oil into the instant pot and secure the lid immediately. You will still get fluffy rice but with much softer texture.
3. Seasoning –
Season with salt. If you did not roast wet rice you can add the oil now into the Instant pot along with salt. Adding oil at this stage without toasting rice will also keep rice from sticking.
You can follow one of the methods.
Saute rice in oil, add liquids salt and pressure cook.
Add rice, liquids to instant pot, add oil and salt and pressure cook.
4. Pressure cook –
Before closing the lid, stir rice in the liquids a little. This will evenly spread the rice in the pressure cooker pan for even cooking.
Place the lid on the Instant pot. Secure it and ensure the valve is in “sealing position”.
Press “Rice” button on the panel. You want the timer to show 12 minutes. If it’s not showing 12 minutes, adjust the timer.
Let the Instant pot do it job.
Once done, allow it to sit for 10 minutes for natural release.
Before opening the lid, check for the pressure. If there is any build in pressure, manually release it by turning the valve to “venting position”.
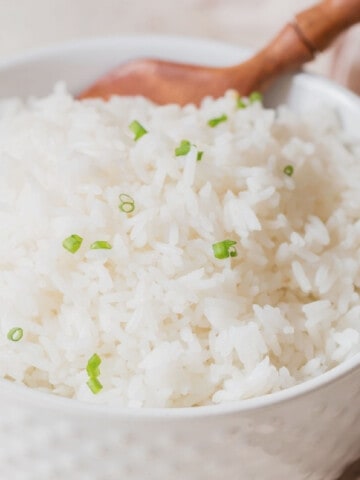
Open lid, fluff the rice with fork gently. Serve.
Please note you will get fluffy, slightly chewy rice with my instructions. This is the result of toasting rice before cooking and the time of cooking and resting.
Allow it to sit longer if you are after soft texture rice.

Instant Pot Brown Rice –
Cooking fluffy, tender brown rice in Instant Pot is effortless. We are sharing few tips to cook fluffy, tender instant pot brown rice every single time.
Instant pot brown rice takes a bit of time to cook (23 minutes PRESSURE COOK setting + 10 minutes NATURAL PRESSURE RELEASE). But the results are amazing.
You get perfectly cooked brown rice every single time. For some reason, instant pot brown rice tastes better too, compared to brown rice cooked on stove top. Try it.

Rinse –
Yes we want to rinse brown rice as well. Rinse until the cloudy water runs through and you see clear water running out.
Rice to liquid ratio –
1 cup rice
1 ¼ cup liquid (you can use vegetable broth, chicken broth, or just water), remember 1 cup liquid is measured as 250 ml
1 tablespoon vegetable oil
¼ teaspoon sea salt
I toasted brown rice too. You can skip this step totally and add rinsed rice and pour water or stock in the Instant pot inner pan.
Optional seasoning – sea salt and oil. Add this if you don’t like bland boring rice.
Quickly stir the rice before closing the lid.
Place the lid on the Instant pot. Secure it and ensure the valve is in “sealing position”.
Press “Rice” button on the panel. You want the timer to show 23 minutes. If it’s not showing 23 minutes, press rice button until it show 23 minutes.
Let the Instant pot do it job.
Once done, allow it to sit for 10 minutes for natural release.
Before opening the lid, check for the pressure. If there is any build in pressure, manually release it by turning the valve to “venting position”.
Open lid, fluff the rice with fork gently. Serve.
If rice is wet and you see liquids, allow the rice to sit in the pan. This will escape the moisture. Then serve.

Don’t forget to Subscribe to CurryTrail Recipes below to get our newest recipes delivered straight to your inbox.
LOVE THIS RECIPE? KEEP IN TOUCH AND DON’T MISS OUT ON ANY OF CURRYTRAIL RECIPES! FOLLOW ME ON INSTAGRAM, PINTEREST, FACEBOOK, TWITTER.
HAVE YOU TRIED ONE OF MY RECIPES? I’D LOVE TO SEE WHAT YOU’VE MADE! TAKE A PICTURE AND USE THE HASHTAG #CURRYTRAIL ON INSTAGRAM SO I CAN SEE! I’LL DO A HAPPY DANCE IF YOU TRY MY RECIPE AND SHARE IT WITH US!
WATCH QUICK VIDEO ON HOW TO COOK RICE IN INSTANT POT
Ways to use the rice cooked in Instant Pot –
Coconut Rice (Vegan) – using white rice
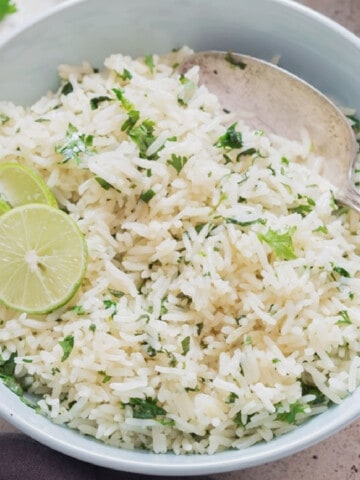
Pepper Rice – using Basmati rice
Mushroom spinach brown rice – using brown rice
Cooking Perfect Rice in an Instant Pot (White and Brown Rice)
Ingredients
- 1 cup 200 gm white rice
- 1 cup 250ml water or chicken/vegetable stock
Optional seasoning -
- 1 tablespoon vegetable oil
- ¼ teaspoon sea salt
Instructions
- Soak rice in enough water for 5-10 minutes. Rinse rice in wire mess until clear water runs (this step removes excess starch and any dirt from rice).
- Turn on the Instant pot.
- Optional step – press “Saute” button on the pot. Add oil and into it rinsed rice. Stir constantly for 2 to 3 minutes. Toasting rice enhances the nutty flavor. Oil avoids rice from sticking.
- Add liquids over the rice, careful while pouring water or stock. The hot pan inside the Instant pot will make water splutter. Sprinkle salt.
- Quickly stir the rice in water.
- Cover the lid, ensure it’s secure. Turn the valva to “sealing position”.
- Press “Rice” button on the panel. You want the timer to show 12 minutes. If it’s not showing 12 minutes, adjust the timer. Let the Instant pot do it job.
- After the cooking time, allow the Instant pot to sit for 10 minutes for NATURAL RELEASE.
- If there is any press, release it manually by pushing the valve to “release position”.
- 10. Open the lid carefully, beware of hot liquids dripping from the lid.
- 11. Fluff with fork.
- 12. Serve.
Notes
Nutrition
*this post may contain affiliate link.
“PIN IT” for later


Comments & Reviews
Jack Mcritchie says
I followed your technique for white rice, other than sauteing the rice. Soaked for at least 5 minutes. Used the “Rice Button” for the timing of 12 minutes. Rice still came out starchy. Like others, I now regret getting rid of my old rice cooker.????
jyothirajesh says
Sorry to hear that. It all depends on the type of rice you use. Did you rinse rice and if you did how many times did you rinse it? Rinsing is crucial to remove starch.
Kelly Sullivan says
This is my first time making basmati rice in the instapot I followed your directions but my instapot when I turned it on said 3 minutes I just add it to the 12 minutes but it also on the low setting is it supposed to be on high? And his much us 250 ml of liquid? 1&1/2cups?
Thank u
Kelly Sullivan
jyothirajesh says
That’s right, you need to adjust the timing using the + or – button. I use 1 1/4 to 1 1/2 cups water for every 1 cup basmati rice. Try with 1 1/2 cup water for 1 cup rice the first time. It should turn out great. In case you find rice turning mushy, reduce water to 1 1/4 next time. It highly depends on the quality (old, new rice makes difference) of rice you use.
Robin says
I’m not sure what happened. I followed the recipe exactly. I got mushy rice. How can that be?
jyothirajesh says
OH. OK so a few things I can think ok – what type of rice did you use (not the Japanese sticky rice variety I guess?)
Did you rinse rice before cooking?
Also sauteing rice helps cook rice well with each grains separate.
I would first look at the rice variety (type).
Robin says
It was Thai Jasmine rice. I have the instapot duo plus, i used the rice setting. One step I didn’t do, I just noticed, is to soak the rice 5-10 minutes, all other steps were exact. Yes, I rinsed it and sautéed it. I really want to get this right because I gave away my rice cooker, which made perfect rice every time and I expected that from the instapot. Thanks for your help.
jyothirajesh says
Can you try and adjust the timer to the mentioned time in the recipe post? I have not tried Thai Jasmine rice, but have cooked long grain, medium grain white rice and medium grain brown rice and it has worked for me.
Rebecca says
I need to cook 3 cups of rice, to make 6 cups cooked. Should I still set the timer for 12 minutes?
jyothirajesh says
Yes, cooking time doesn’t change even if you double the quantity. Just make sure the rice and liquid levels are NOT over the Max-full lines
Barb B. says
White rice turned out great. I cooked 1.5 cups. Next time I’ll try 2 c. Thank you.
jyothirajesh says
Glad you tried and loved this recipe Barb. Happy cooking
MatElsk says
I loved this posts! I read your blog fairly often and you’re always coming out with
some great stuff! I shared this on my Facebook and my followers loved it!
Keep up the good work!:)
jyothirajesh says
Glad you liked it, thank you
Tams says
THANK YOU! Perfectly tender, loose rice. New to this method of cooking.
jyothirajesh says
I’m so glad you tried the recipe and it turned out right! Happy to have you here Tams